Homemade Yogurt
I love yogurt. In an effort to prove my devotion to the creamy and tangy Greek yogurt that I adore I've started to
make my own.
Aside from some time and attention, yogurt is not that difficult to make and the homemade stuff is quite delicious and the leftover whey is very useful in bread making as I'll try to show later on.
First here's what you need:
Aside from some time and attention, yogurt is not that difficult to make and the homemade stuff is quite delicious and the leftover whey is very useful in bread making as I'll try to show later on.
First here's what you need:
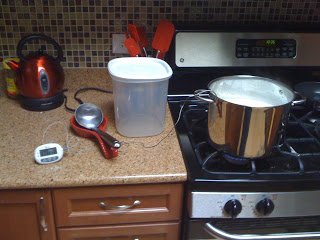 |
| Yogurt making stuff! |
- 1 Gallon Milk (Any kind of real milk, skim to whole, the fat percentage matters but you'll be able to make reasonable yogurt with any of them).
- 1 container yogurt with active live cultures (6 to 8oz)
- 1 6-8 quart pot
- 1 metal or plastic spoon
- instant read probe thermometer with an operating range between 80 and 200 degrees F.
- 1 6-8 quart plastic container with lid
Prep time:
You'll need to be actively involved in the yogurt making for about an hour but then you'll pitch the yogurt and
setup a nice warm place and let it sit for anywhere from 6 - 12 hours.
Procedure:
- At milk to your pot and add your thermometer. Turn on your stove to medium high heat and stir occasionally (every 5 - 10 minutes) until the temperature reaches 180 degrees F.
- While the milk is heating you'll want to prepare your sink with a couple inches of water and ice so that you can quickly cool the milk and prevent the milk from continuing to heat to much past 180 F on the stove.
- After the milk reaches 180F pour the milk into your plastic container. Transfer your probe and loosely cover the container with your lid.
- Place the plastic container in your sink to cool to around 112F. The milk can be hotter or cooler (90 - 120F) but staying close to this number and keeping your mixture around this temperature will ensure your yogurt bacteria stay happy. If the milk is too hot when you add your starter there is a good chance you'll kill the yogurt so you should err on the cool side.
- Once you've reached a reasonably cool temp around 112F, go ahead and add the container of yogurt. Stir the yogurt into the milk.
- Once again cover the plastic container with the lid and insert your probe thermometer.
- Find a warm place to keep the yogurt and place it there. Cover with a towel or blanket to help keep it's temperature consistent.
- Allow the yogurt bacteria to incubate in a warm environment (again, around 112F) for anywhere from 4 to 12 hours (yes, you can leave it overnight). I turn on my stove to it's lowest setting and place the yogurt on top covered in a towel which seems to work quite nicely and maintains a reasonable temp of 110 F
- You can taste test the yogurt to see how tangy it is and the longer you let the yogurt ferment the tangier it will be. Remember that the texture will be somewhat off until the yogurt is allowed to set in the refrigerator.
- I prefer really tangy yogurt so I will most likely let the yogurt sit 10-12 hours.
- At the end of this period, stir the yogurt, cover, and place in the refrigerator until cool. The stirring and refrigeration help to put the bacteria back to sleep and puts the fermentation process on hold. And of course I should mention that this is the perfect time to add vanilla or agave nectar to sweeten or flavor your yogurt.
- Once the yogurt has cooled enjoy the yogurt or strain the hell out of it to make thick and delicious Greek style yogurt or, if you prefer, cream cheese.
I plan to strain this next batch so I'll cover that simple process next. I strongly suggest that you
strain your yogurt. While the yogurt you have above is tasty, it'll be much more decadent if you go
ahead and strain it.
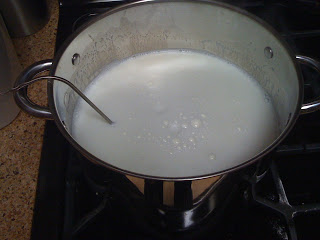 |
| On the stove, notice the nice froth here at 180F |
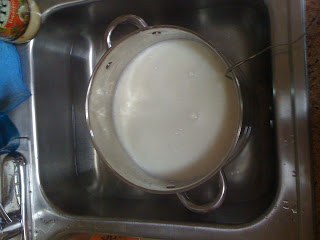 |
| Cooling down in the sink |
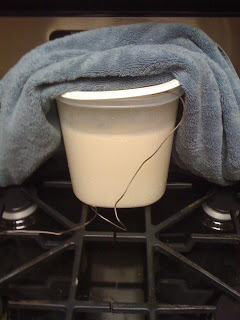 |
| Fermenting on the stove warm and cozy under a towel |
I find it really quite cool how many different techniques people can use to produce yogurt. I appreciate your ideas because I am hoping to find a recipe that is minimal effort and produces awesome yogurt.
I started out heating the milk to high temperatures and then trying to cool it down with ice before it started scorching.
I found you can skip this step.
The milk bacteria seem to work just fine with the yogurt culture. Furthermore, milk loses most of its flavor when it's heated to high temperature. I think a lot more stuff than just the bacteria gets broken down.
Works well to heat the milk up very gently and only to inoculation temperature.
This can take an hour or longer with a two gallon batch, but I just do other things while checking back on it periodically.
Since even whole milk is a bit lacking in character, I find yogurt also benefits from some heavy cream. About a half pint to a pint per gallon makes it extra rich.
I find a grainy texture usually results only when the yogurt is strained a bit prematurely, before curd and whey have completely separated. I find it comes out a bit grainy like a farmers cheese at less than 7 hours. I've fermented for as long as 24 hours and still gotten decent batches. Best to err on the side of tartness.
No need to cool the yogurt before straining. Just as well to let it continue developing even in your strainer. Not to mention it will strain faster when warm.
The yogurt doesn't go completely dormant when refrigerated. The bacteria still slowly does its work. Probably best to wait until serving before adding sweeteners. Easily digestible, naked sugars make it easy for new organisms to move in or ones already there to proliferate out of control.